


zmk1962
-
Posts
2,954 -
Joined
-
Last visited
-
Days Won
67
Content Type
Profiles
Forums
Gallery
Events
Fishing Tips, Advice and Articles
Blogs
Store
Everything posted by zmk1962
-
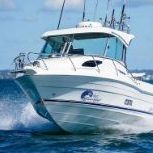
Still searching for a compatible 27mhz whip. I have attached photos of mine - the logo on the base is KINGRAY which is now GME (and yes it looks like the new VHF AE30 base). After much searching I have found that my 27mhz antenna is a GME AE60 ... so if anyone has one lurking in their shed that they no longer need - please PM me !!! Cheers. Zoran

-
Agree with the previous posts - they are all deterrents only. In my case I put a small padlock through the coupling connector locking it in the open position, then use one of those U-coupling locks to cover the tow ball hole as well. If away for longer periodss I have also put a high tensile chain through a wheel around the trailer springs, axle and wheel chocks which are dyna bolted to the driveway. I am told many boats are stolen by being towed onto a tilt tray tow truck - so if they want it - they will take it. Insurance starts where the deterrents stop - so I make sure my policy values covers me for replacement as best as possible - check the PDS. I was with NRMA for many years, then went to Club Med for about 6yrs as they specialized in boats and understood that boat improvements (eg new fuel tank, rocket launchers) actually increased the value. Then Club Med changed and wanted to offer a market value policy (I always prefer agreed value - market value is significantly dependent on the make and reputation of your hull, the condition and how you look after it and any upgrades you have made... NOT just age - I could never figure out how they planned to assess the market value pre damage or if the boat was under water !!!), so I went back to NRMA who surprisingly had improved in their understanding of boat insurance... been happy since. Key points: shop around, check the policy PDS (agreed value vs market value was important to me - as I have an oldie but goodie hull).
-
Thanks locodave ... much appreciated !! I have VHF installed as well - so this is very much an exercise to get the 27mhz working as cost effectively as possible. I have PM'd Ian as well .... beep beep...dash...beep beep... Cheers Zoran
-
Great Idea ! .... Cheers Zoran
-
Ok so I eventually managed to borrow an antenna that suits my base from a good friend and tested my 27mhz system - Sydney Marine Rescue reception was loud and clear at 12mile yesterday !!! So now I am after a replacement 27mhz antenna. Please PM me If anyone wants to sell theirs or knows where I can get one that has a base such as shown in the picture. I'm pretty sure it was a GME but they don't seem to sell this model anymore. Thanks.
-
I run a 6.35m full glass hull - with gear, fuel, and of course the lazy buggers that stay on board and have to be winched up with the boat - I am topping 2.2T. I was struggling with my 3 speed manual winch....even on the highest gear ratio.... so I now travel with 2 winch handles.... the standard short one....and one on which I lengthened the shaft - I simply cut the standard shaft in the middle and welded a section inbetween. The extra length in the shaft roughly doubled my winch power....I can now winch with one hand. The circles are bigger and the wind is slower but I only need to do this at the start of the winching. I find that once the boat nose is up, and the hull basically flat with the trailer, I can switch back to the short handle and faster gears. If you are looking for a cheap solution, without having to change the winch this may work for you.
-
If you are planning trips bear in mind weather, tides and sea conditions...your range will change dramatically if you are punching against the tide, into headwind and/or waves or a prevented from getting on a plane. Get to know your boat, take it on a few runs with the tank topped up full. At the end of the trip take a note of the trip distance, sea conditions and what your tank gauge is reading (eg 1/2, 7/8 etc). On your return top up the tank back to full and note how much fuel you had consumed on the trip you just made - you can then calculate your consumption for that trip under those conditions and also get a sense of what your tank gauge is telling you. If you repeat this a few times you will get a good sense of how far you can go - given the current conditions. Starting out with a new rig my general rule of thumb is I will travel away from the ramp until my tank gauge reads maybe 1/3 empty - perhaps a bit more leaving me 1/3 to get back and a buffer if things turn to crap. Case and point - a few years back took a trip to Browns Mt traveling out at about 45km/h (flat conditions) and at that easy planing speed (revs around 4500-5000rpm) got to Browns in just under 1hr (40km out). The forecast for afternoon was for a N/E 5knt wind on 1m seas - I was expecting a smooth tail wind with a following sea - easy return trip. Got half way back and hit an unforecast squall 3m waves, 30+knt winds at 12mile reef (20km out).... those last 20km to the heads took 4.5hrs at an average speed of 5km (and in those conditions this was 2-3000rpm range). I can tell you a burned a hell of a lot more fuel on the return trip - glad I kept the reserve buffer. Cheers and welcome to boating - the considerations are a bit different to driving on the roads !!
-
HA! ... you win.
-
Ha! Glad to hear of another 3 battery fiend out there.... glad I'm not so anal after all !
-
I agree with the previous comments: i) get a second starting battery if you are concerned about safety and need a quick start due to dangerous conditions - consider the time difference in flicking a switch vs undoing battery boxes and hooking up a jump starter (or as I have suggested below - relocate your 2nd battery). ii) keep your batteries charged and topped up using a trickle charger when at home. You can't rely in your alternator unless you are doing long runs. I have one battery that is 10yrs old and just starting to go now. If your interested I placed two posts on my set up and the considerations taken into account to design the set up in another topic http://www.fishraider.com.au/Invision/index.php?showtopic=79491. It may be a bit of overkill for you but the set up has worked for me since I rewired the boat in 1997. Here is also a picture of my trickle charge set up at home: 4 batteries (1 trailer brakes, 3 batteries on boat). Any battery can be tested and trickle charged individually or in any combination without undoing the boat covers or getting in the boat. I have a 4pin plug in the boat to which I attach the corresponding 4pin battery charge cable, and a 2pin plug on the trailer battery box. One other comment - lead acid batteries typically die as a result of 1) being left discharged, or 2) due to vibration - mechanical shock. Its all to do with the lead plates eventually short circuiting (each lead plate contributes 2V). I understand you have a battery mounted at the front of the boat - this is typically where you will experience the MOST vibration and shock pounding through waves. The stern of the boat offers the smoothest ride. Consider relocating the 2nd battery to the stern and introducing a battery switch (giving you choice of 1,2, both, off). This will give you an alternate start battery if you need it and simplify the charging set up for both batteries. Admittedly you will need to run heavy cables to the front to run your electric motor but it seems to me this would be the simplest solution for you.
-
Thanks for the great summary Fab1 !
-
Antony has covered it. Do the 2 voltage tests. With Engine on - if you are getting 13V (and above) your charging system is working. So its most likely: 1. a battery issue (wont hold charge - due to low fluid or cells have collapsed), or 2. the charging current is not getting into the battery (loose or corroded terminals/connections or wiring) With Engine off - if the battery is reading less then 12V its pointing to a battery issue - even though your indicators are showing green - if it has caps I would pull them off and check the battery fluid levels as a first step. Disconnect the battery and give both the connections and battery terminals a scrub with a wire brush or some sandpaper. Reconnect and coat with grease to slow down further corrosion. Note: You can get oxide build up between the terminals and connections and it significantly reduces how much charge your motor puts back into the battery and also how much current you can draw to power your start up.
-
Coin Underneath the Wooden Floor in Painted Aluminium Boat
zmk1962 replied to TunaSickle's topic in Boating
Yup.... I'd keep it covered. -
...the way it was pointed out to me by a good mate of mine... a Kan = king and HA = highest.... so a HA-KAN is the highest of kings...infact the KING of KINGS !! .. ... anyway on our last trip out he also lucked out on the only kings that matter to a fisho... and at best was just good enough to hold the title of prince of rats ....but the others on board were leaning towards the "queen" of rats... but we wont go into all the trash talk that goes on board. Captains rules: 1) What's said on the ocean, stays on the ocean 2) The captains always right, 3) If he is wrong refer to rule 1-2 etc.... he he he. Best of luck with the live bait tank...
-
Yup I charge mine at home. Its can be a pain if each time you have to undo the battery boxes and put on the clips and then re-assemble etc etc Looking for the easy way out I put in some work upfront (I am comfortable with wiring as I played apprentice to my sparkie dad for years). Here is my setup: I have a 4 pin female plug wired into my batteries (3 positive and 1 common negative) - the plug is screwed in place high up on the inside of transom. This 4 pin plug attaches via a male 4 pin plug fitted on an 8m cable to a switch box that is connected to a trickle charger. The switch box is located in my garage. It has 3 switches so that I can charge any combination of the batteries. I also have a battery tester wired into the switch box so I can check the voltage of each battery individually. I know I get losses from the long run of DC cable but heck - I figured it was better then nothing. Now once at home I connect my charging cable (4 pin plugs) and I am done - I can check / charge any combination of batteries from the comfort of my garage. Lead acid batteries last longest if they are kept charged. Running them flat and leaving them flat will see a significantly reduced life span (that's another chemical reaction - and I wont bore people with that one). My mobile mechanic (who does a great job of checking the boat/trailer end to end) recently told me that I really need to change my "utility" battery - it was holding charge - one cell was staring to go - but his real concern was that it was 10yrs old !!! He had no experience with such old batteries - they weren't supposed to last that long.
-
Coin Underneath the Wooden Floor in Painted Aluminium Boat
zmk1962 replied to TunaSickle's topic in Boating
Hmmm.... If you use kitchen salt and tap water it would be a "lab" experiment....for it to emulate the real world, we'd have to try to recreate the pH, salinity and mineral content of sea water (or grab a jar of old briny the next time you are out) and we'd also need a piece of aluminium that's two pack coated with some scratches and nicks in the paint. Personally I'm a naturally curious guy -- so I'd like to see it just to get a sense of the rate of galvanic corrosion - 1day, 1 week, 1 month. It would put a lot of minds at ease I think and what a great way to settle that bar room discussion. How much time do you have Antony?? -
Hi Hakan, we all have a first post ! Welcome "King of kings"! (...anyone that wants an explanation as to my greeting please pm me - he he he) Mate, I don't know of anyone that keeps their engine running just to power the bait pump - it's a bit of overkill. I'll explain my set up and you can draw some conclusions from how you want to run yours. I have 3 (640CCA) batteries across the back. Each is on an isolator switch. I run all the electricals and can start the motor from any battery or any combination of batteries. Similarly when the motor is running I can charge any combination of batteries or just the one I am running from. Typically I run off the newest (prime) battery, and only when it starts to struggle cranking the motor do I swap to the 2nd (backup battery). By run - I mean everything is drawing from that one battery. On a typical day with long offshore runs during which the battery is being recharged I rarely have to swap to the backup, unlike the days where we fish the harbour or rivers when there is more stationary time and more motor starts. You can run your 2 battery set up in a similar way - provided both of your batteries are able to start the motor. Use one until it is discharged and move to the other - set up your charging circuit so that when you have started your motor you can re-charge one or both. Obviously if you are down to 1 battery, you may want to limit the electrical load until you have had time to recharge your 2nd. My Merc puts out 40Amps on the charging circuit - you may want to check your motor to get a sense of how much charge is going back into your batteries while under way. The third battery is what I call my utilities battery. It is the oldest battery - this is the one I use when I pull up for a long overnight session - it runs everything all night (bait pump, night lights, sounder, deck lights and at one stage even a little TV for the kids in the cabin) on full overnight trips this battery drains to zero - especially in winter. OK my 3 way battery set up is overkill - I started with 2 - and ended up with 3 because one of the original 2 batteries was still good and I was doing a lot of overnighters at that time...... and I admit I am a bit anal and always wanted at least one charged battery for the motor. Regarding calculating how long your battery will last running just the bait pump - here's how I would do it - perhaps one of the members with an electrical background can chip in : 1) Check the capacity rating of your batteries - you are looking for the Amp hours number 2) Check your bait pump Watt (W) rating and convert that to Amps (A). Use a calculator like the one here http://www.rapidtables.com/calc/electric/Watt_to_Amp_Calculator.htm, or the formula I=P/V I=AMPS, P=Watts, V=volts (usually 12V in your boat DC circuit) 3) Divide the Battery Amp hours by the bait pump draw in Amps and the resulting number is the number of hours that your battery should roughly last BTW, that bin looks really big - you might have to use your sabiki jig to recatch your live bait! Are you sure you want to run around with an extra 100kg of weight on your transom - it will affect how your boat rides. My live bait tank is about 35L and I run a 350GPH pump for circulation when stationary, or just off the stainless bent tube pickup when under way.
-
Coin Underneath the Wooden Floor in Painted Aluminium Boat
zmk1962 replied to TunaSickle's topic in Boating
billfisher has got me worried about making two posts on the same topic....is that an unspoken rule guys and gals??? ....Anyway - here is what I remember from my past: Corrosion - oxidation - is the process of metal atoms binding with oxygen atoms creating an oxide layer - if the metal is iron - the product is FeO2 iron oxide or "rust". If its aluminium the product is aluminium oxide etc. Galvanic corrosion is a different process - one that does not involve Oxygen per se. As billfisher pointed out "With galvanic corrosion or in a galvanic cell one metal robs the other metal of electrons. it's also called a Redox reaction (short for reduction/ oxidisation)." So they are two different processes. The interesting thing though -- with some metals the oxide layer is actually a VERY good barrier to further oxidation because the oxide layer is impervious to additional Oxygen atoms reaching the metal underneath. The oxide is like a self protecting skin. Aluminium is one of those metals. Aluminium is actually very reactive. Aluminium oxide is very inert. Ever noticed how when you cut aluminium it is really shiny - that's the base metal - and within a very short period of time that shiny metal becomes a dull oxidised metal colour - thats the aluminium oxide that has formed on the surface and no further oxidation takes place. So aluminium gets its durability from its oxide coating. Iron/steel on the other hand is different. Iron Oxide allows oxygen through and hence the "rust" just keeps going. An then comes the topic of stainless steel (alloys). From memory stainless steel is an alloy of several atoms the main being Iron/Carbon/Chromium etc... the Chromium binds with oxygen and forms Chromium tri-oxide - impervious to oxygen - that's the shiny skin on stainless steel. If you paint stainless, or mould a plastic handle onto a stainless blade, or leave greasy finger prints on stainless --- at the edge where the stainless steel meets the paint/oil/plastic - you will eventually see "rust". Why??... the Chromium cannot get a 3rd Oxygen atom to bind there and hence some iron atoms are left exposed to bind with Oxygen and then you get good old "rust" on your stainless. So keep your stainless clean guys and just expect that you will get some rust wherever your stainless work joins something else - simple rub with s/steel wool rexposes the chromium and all will be good for a while again !! Hope that helps Antony. .... and now that I have completely gone off topic it really is time for that morning cuppa.... -
I'm with Fab1 on his comments - they are spot on from my experience. Use copious quantities of fresh water to dissolve away the salt rather then high pressure to drive the salt water further in. When I can't get to fresh water immediately - I try and displace as much as I can. I remember I wrote about this in a previous chat - but in short after I have launched my boat and reversed the trailer in the parking bay... I run around with a spray can of silicon spray (preferred) or Lanox (Inox with Lanolin) and using the little plastic tube I squirt a bit inbetween the brake pad and the caliper hyraudalic cylinder ram. This helps displace the salt water that's in there. This has significantly extended the time between services. I have a set of Trigg hubs/rotors and calipers that gave me trouble with seizing for a while. Eventually a very good mechanic put a micrometer over the disc rotor and found that it was slighly oversized (probably built that way for marine use in anticipation of rust and hence allowing rapid wear down). There was just not enough clearance with the pads that were being put in (with spacers). So we looked for a different thinner brand and all has been good since. BTW, I also run a hydrostar Carlise controller.
-
Coin Underneath the Wooden Floor in Painted Aluminium Boat
zmk1962 replied to TunaSickle's topic in Boating
Sorry TunaSickle, I'm with billfisher on this one. Its galvanic corrosion you need to worry about - put two dissimilar metals in an electolyte solution and the less noble metal WILL corrode. The fact that your boat is painted buys you time until the paint fails (starting usually at joints/welds where expansion and contraction movement is most concentrated). Why not try a simple test - drop a 5c coin onto a piece of aluminum in a jar of salt water. Maybe you can post photos of your experiment at say 1day, 1week, 1month !!!! -
I use old reo bars (get the big thick stuff from construction sites) and a Bunnings Ozito drop saw to cut to 1ft or so lenghts. Don't bother trying to drill for the line, just wrap a bit of coathanger or fencing wire to form a loop -- the weights don't last long enough to bother being fancy and drilling them. Re electric. The guys that come out with me have used a Miya Epoch 8 and swear by it, and others Tanacom Bulls 1000 - they do the job at Brown's esp for the mate that has a bung shoulder. Like Oz Brett above said, I hit Brown's maybe 3 times in a year and for me purchasing an electric is interesting but down on my priority list at present...so for the deep stuff I am very old school and use an Alvey SeaKing manual winch (1.1m lift per turn) - indestructible item which I have modified with what I consider a better pulley/boom arrangement than the little s/s spigot they come with.... I brought up a 20kg bar cod faster than the epoch brought up 2 gemmies. Mind you if I had to do it 2-3 times in a row the electric would win.... but then there are boat catch limits to watch ! As with anything with boating/fishing... what problem are you trying to solve with the electric reel ??
-
Hi Commodore - yes I did. Thank you. I sent an SMS back straight away (think it was Sunday night).... I'll go and check my phone now!
-
I read above that you have a breather hose fitted -- But have you checked the length of the breather - is it kinked or blocked anywhere?? Replace it if you are in doubt. I had an intermittent problem where my motor would not rev up from troll speed - when I applied throttle it would tend to die down and splutter like running our of fuel - when that happened I had to try and "goose" the throttle controls and eventually she would rev up... Long story short, after several good mechanics had already gone over and given a thumbs up to the motor, pump and filters I was about to accept this as a "feature" of the motor but then by chance while working on another bit I had my neck in close to where the hoses connected with the tank and notices that the breather was kinked. Changed the breather hose and the problem has not reappeared since. So my conclusion was if everything was flat and level - vapour would get thru the kink and the tank would breathe - hence most of the time everything was fine, but if some fuel had pushed up past the kink (like when you troll through swell) this trapped fuel would restrict the tank breathing and hence added restriction on sucking fuel when trying to rev up. You also mentioned that when you fill up "it appeared full with fuel coming up the clear filler hose" - was there fuel coming out of your breather?? If not, then again this is pointing to a breather problem.
-
We are all left guessing until VOLITAN (Arron) surfaces - my 2c is he is trying to assess if he has the gear shift in the correct position after re-assembly. So on that assumption ... Arron: If the engine is in gear you should not be able to turn the prop without significant force, if its in neutral you will hear the clicking when you spin the prop. But I am not sure how you would tell if you are in forward or reverse just by spinning the prop.
-
PM sent Commodore.


